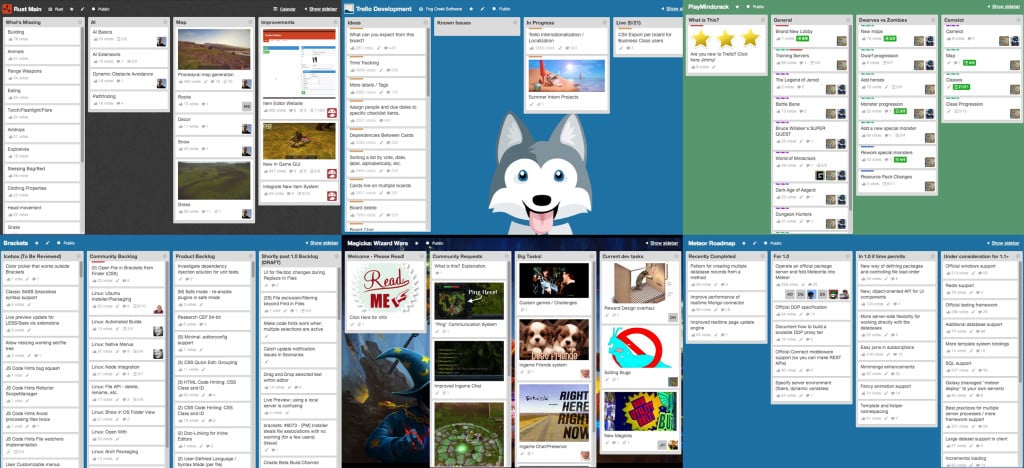
Recently we noticed a bunch of Twitter buzz about some hot Trello boards. Checking out some stats on Google Analytics, we observed that most of the top viewed public Trello boards are businesses using Trello to publicly roadmap their products. To name a few:
- Rust (a survival game)
- Mindcrack (a game)
- Brackets (an online editor)
- Subnautica (a game)
- Meteor (a web framework)
- Magicka: Wizard Wars (a game)
- HabitRPG (a self-improvement app)
- Trello (naturally!)
Why do this? Because a public roadmapping board is a great place to engage with your community, get input from power users, share your product’s development, and keep people up to date on any issues or releases.
We reached out to Garry Newman and asked him about his experience using Trello to road map their game, Rust, which is currently in alpha development:
“The huge benefit for us with Trello is that it’s accessible to the public, it’s laid out in a simple way that the public can follow. This means that we can communicate directly with our community – they can see exactly what we’re doing. Each issue or feature is kind of like a mini blog… Using Trello for us ultimately means we don’t have to spend half our time in two different systems, one for staff and one for the public. We can update one and everyone benefits.”
Jason from Mindcrack echoed this sentiment when I spoke with him, saying “It let’s our entire community see what we are working on.”
This got us thinking, perhaps there are more teams out there that could benefit from roadmapping their product publicly in Trello, so this article is meant to give a couple of tips to help you get started. I will talk about board visibility settings, commenting and voting permissions, board backgrounds, sharing card links via social media, and a few other fun things.
Before I get started, if you’re worried that having a public board will reveal too much, remember that Trello allows you to have different permissions on different boards, so you can share publicly only the information you wish to share.
Make That Board Public
Like in the classic baseball film, Field of Dreams, “If you build it they will come…” Except in this case, if you make your roadmapping board publicly visible, they will come and they will give you input! Your fans will also be able to subscribe to a card, perhaps a feature they are craving, and follow its progress across your board, receiving notifications as it glides across your lists, from “ideas” to “doing” to “shipped”.
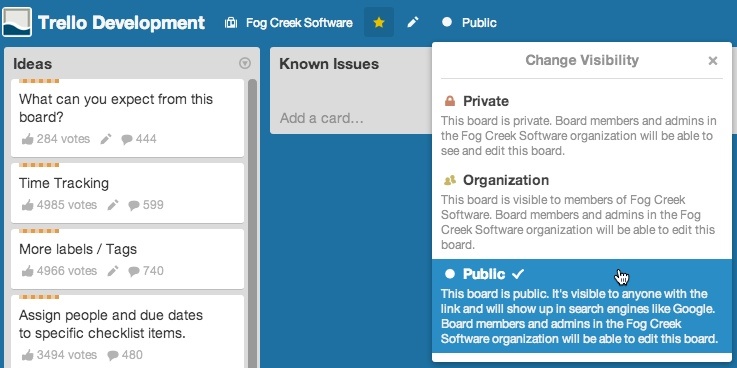
When your board is public, it is visible to anyone with the URL and it will show up in search engines like Google. Set the visibility of your board so that it is publicly viewable by clicking “private” or “team visible” to the right of your board’s name and team in the header, and changing it to “public”. If the board is already set to public, then you are already one step ahead.
While you are at it, you may want to consider making your team public in Trello so that your fans can easily access all of your team’s public boards through one simple URL, and you will be able to bling out the page with a company logo and description. For example, Trello, Inc. is a public team: https://trello.com/trelloinc. Set your team public in the settings tab for your team.
Also, make sure to link your public roadmapping board from your company’s website so you can easily steer traffic to it and get search engines to index it quicker.
Setting Up Voting And Commenting Permissions
If you would like to have your community be a part of the development process, then enabling commenting and up voting are great ways to get feedback from the people that matter the most, your users! As Garry Newman puts it,
“The voting feature is especially useful to us, because it means we can put a bunch of stuff that we want to get done on the board, and then we can let the public vote up the issues that they want the most. This allows us to organize our flow according to what the community deem most important to them.”
To enable the voting power-up for your board go the board’s menu in the sidebar and select “Power-ups”. In the power-ups menu select voting, then select enable, and in the settings tab make sure to give voting permissions to public members.
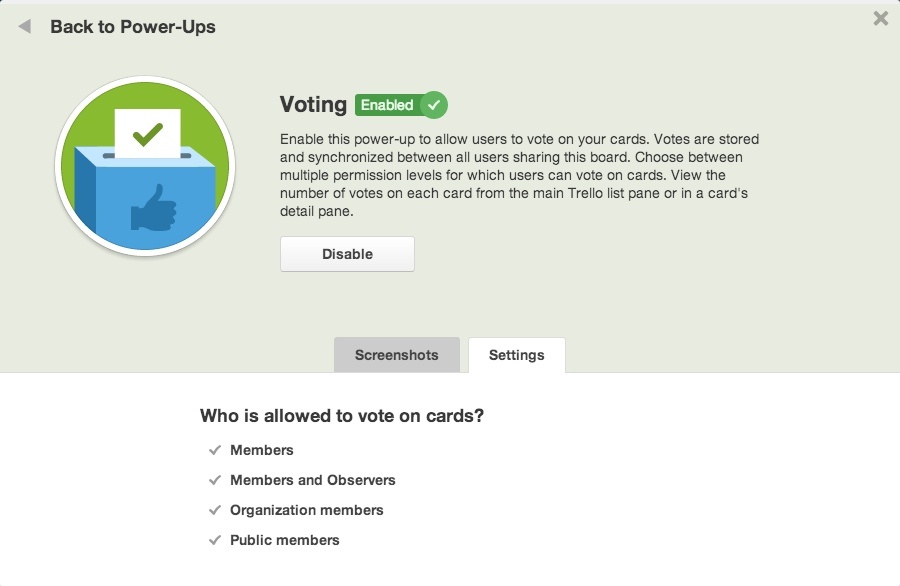
(Bonus tip: While you are in the power-ups menu, if your board deals with dates, turn on the calendar power-up too so the public can view those cards in a calendar view!)
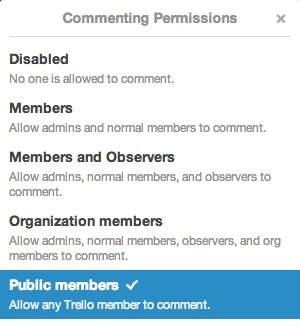
Turn on public commenting for your board in your board’s settings in the sidebar. Please note that your board must be public in order to be able to turn on this feature. Also, don’t be worried about the trolls of the world, board admins can easily delete any unwanted comments.
Custom Backgrounds
One thing that you can do is upload your company’s logo as a background and tile it across the board, but an even cooler option is to place your logo or image on a background that integrates nicely with the list layout.
Because Trello is responsive to the size of your browser window, it can require a little bit of trial and error to find the perfect location for your logo so that it displays in most window sizes. Here are some basic guidelines for creating a custom board background like mine:
- Board dimension: 1280px x 720px
- Logo dimension: 400px wide
- Logo Placement: 60px from the bottom left corner and 30px from the left side
And here’s a .psd template to help get you started: TrelloBackgroundTemplate1280x720.psd
Check out some other cool roadmapping boards that use backgrounds and logo placement to great effect…
Share New Cards On Twitter
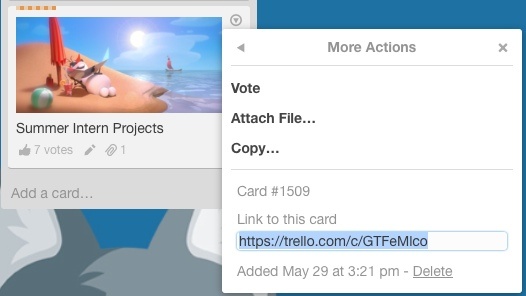
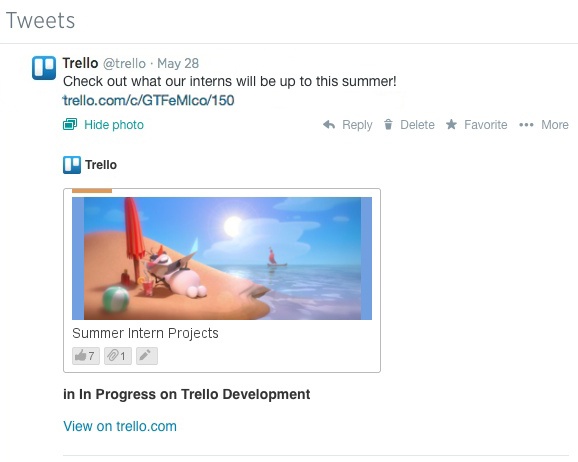
Pretend you have some killer new feature (or don’t pretend because you know you have some killer new feature always on tap) and you want to get some input from the people that love your product the most. Once you have added your new feature idea as a card on your roadmapping board, you can easily share the card on Twitter and other social media by linking directly to the card. Cards will embed in your post showing an image of the card, très cool!
Get a card’s URL by clicking the dropdown menu that appears when hovering your mouse on the card and selecting “More Actions”, by right clicking the card or by opening the card and copying the URL from your address bar. (If that’s too many clicks for you, you can also just hover you mouse over the card and press Ctrl+C or ⌘+C to put the card URL on your clipboard)
And then get it out in the wild…
A Few Other Roadmap Tips…
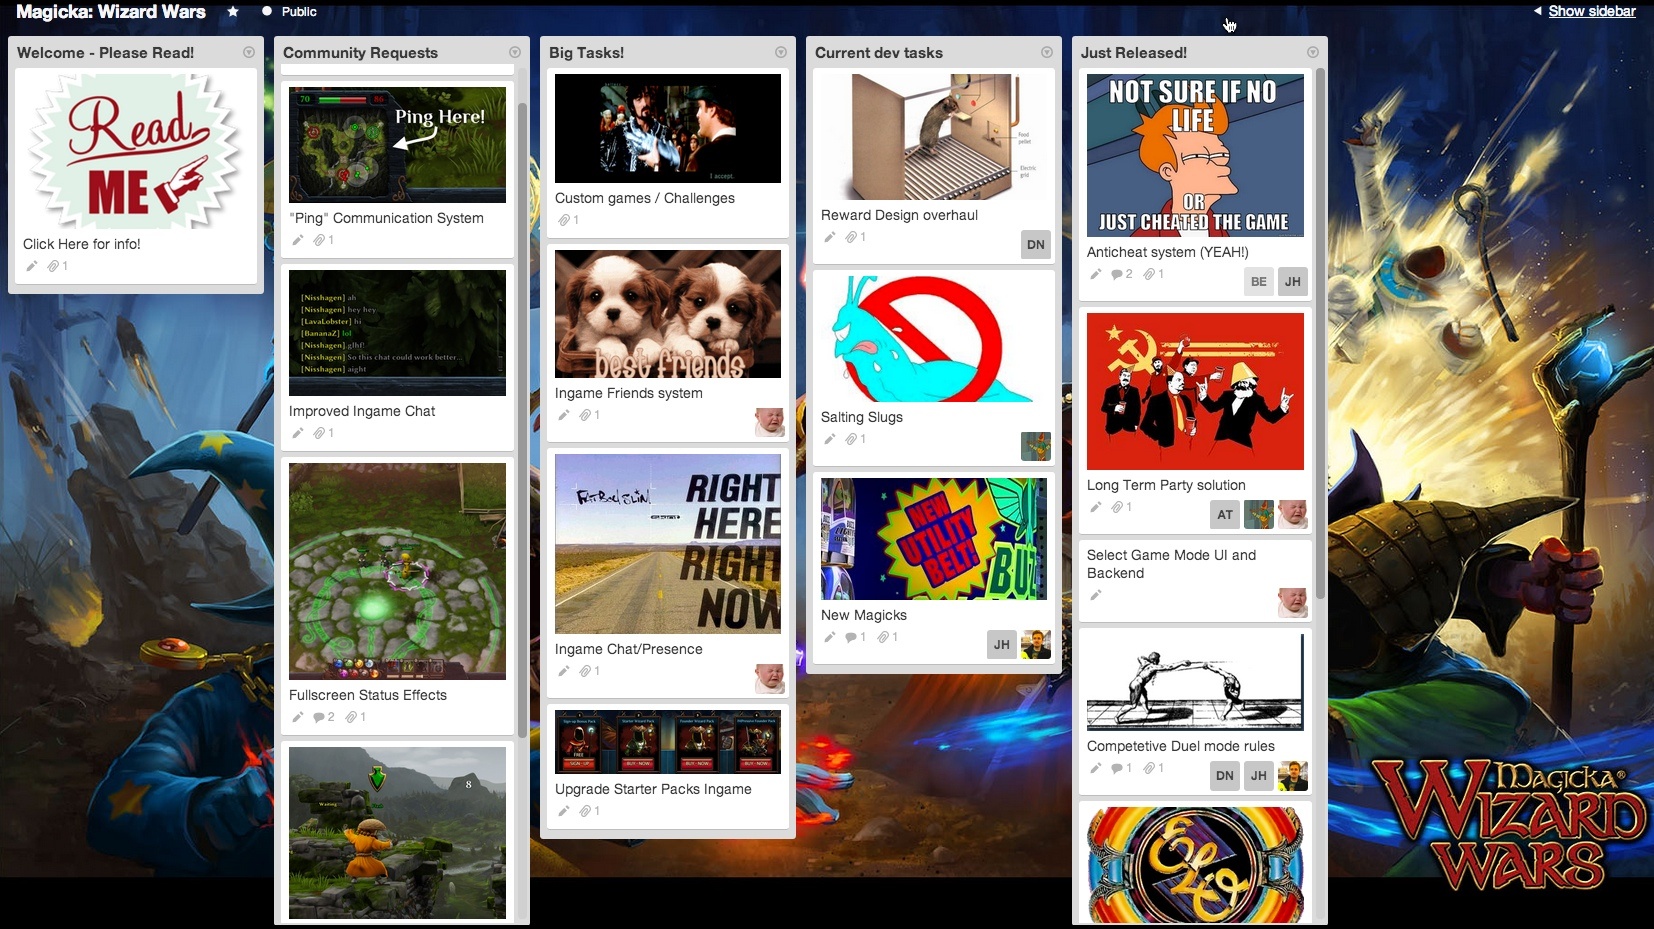
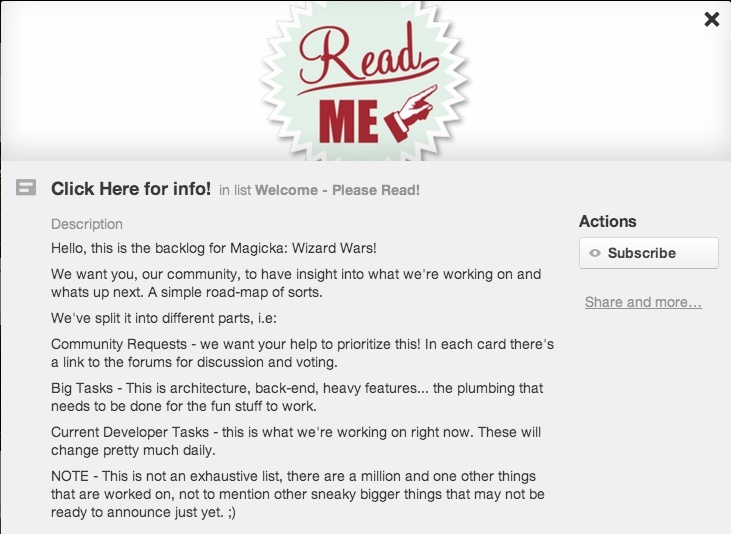
To prevent your adoring fans from clicking about aimlessly on your board, it is always nice to create a “Welcome” or “How to Use” card that tells your fans the intent of the board and how to use it. This is commonly done by either creating a “Welcome” list as the first list on your board, or by adding a card to the top position on your first list that explains how you plan to share information on the board, how you would like your audience to interact, what different labels mean, etc. For a great example, check out what Magicka: Wizard Wars did for their welcome card:
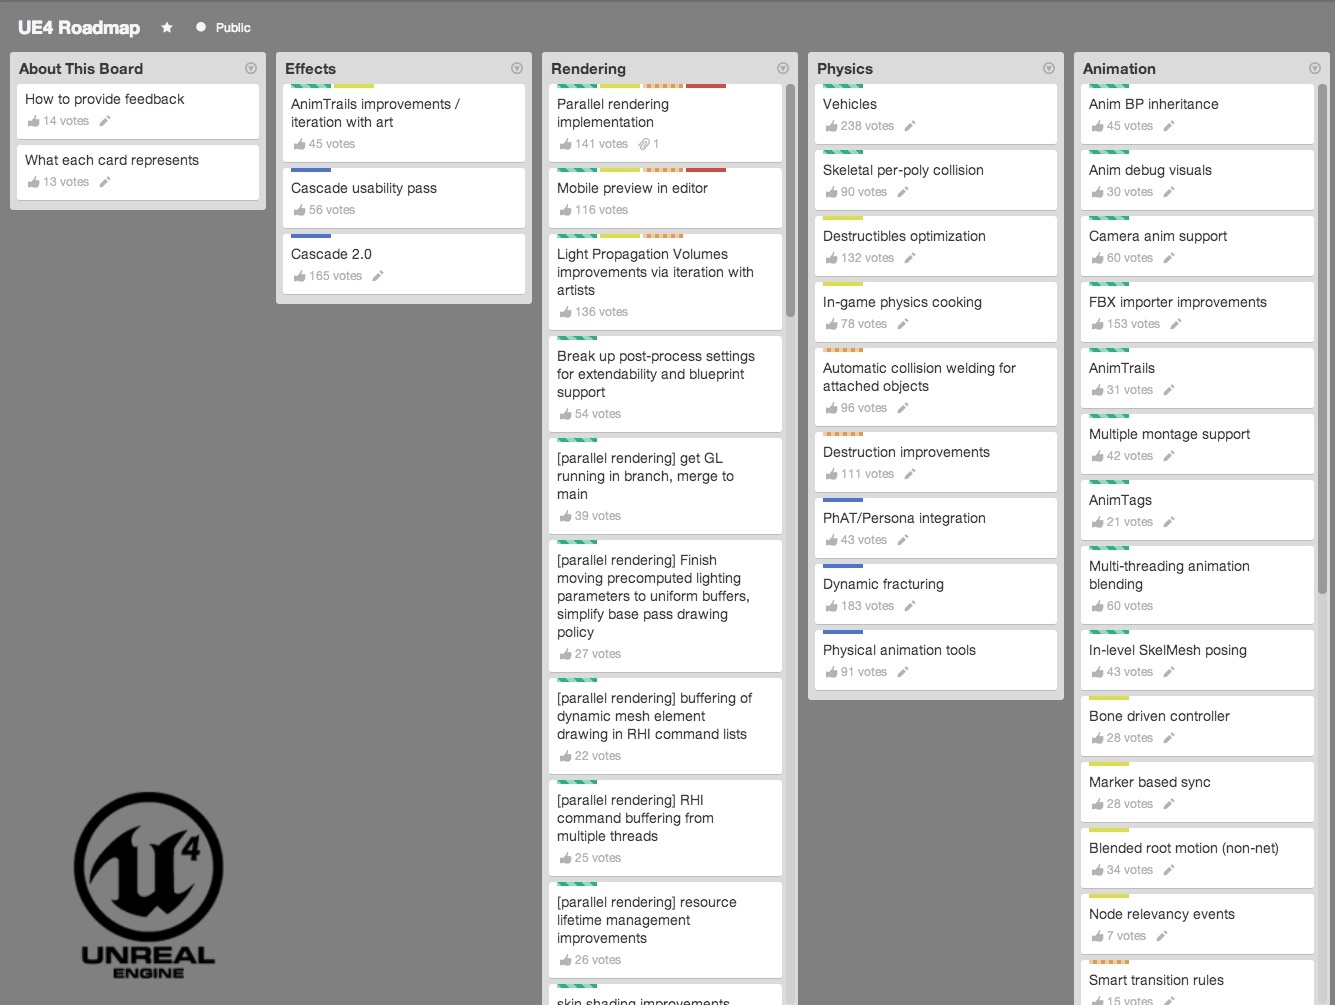
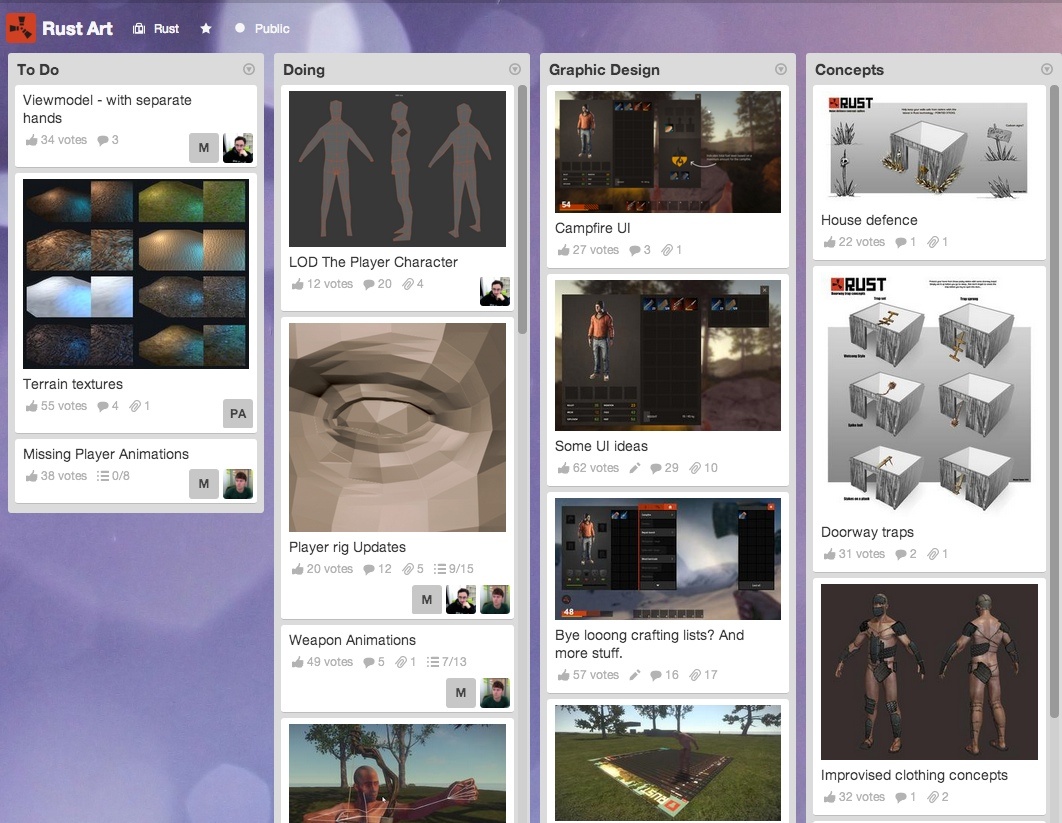
If you have a card that is all about some awesome new graphic, attach the image to your card and set it as a card cover so that your audience can see it. Card covers are on by default and any image uploaded to a card will automatically be displayed on the front. Check out what Rust did for their art roadmapping board to see how nice this looks:
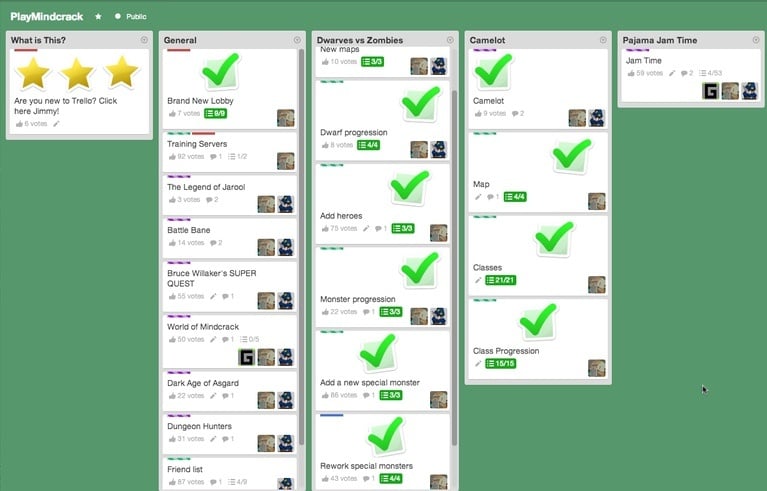
Stickers are a great way to add visual information to your board in a fun way. As Jason from Mindcrack says ”We use stickers quite a bit to mark when things are being worked on or they’re done, instead of archiving them, so that the community can still see them.” Check out the Mindcrack board with all those green checkmarks of features that have shipped:
And, you can upload custom stickers to add to your board. Maybe a sword for all the bugs that have been slain or fun game icons and characters. The options are endless!
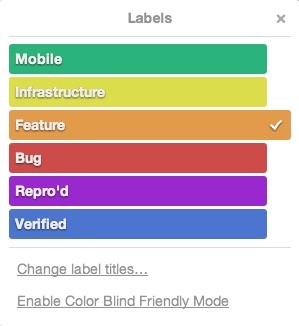
Finally, labels are your friend. Try using labels on your roadmapping board to provide additional information about your cards, and to allow easy filtering of the cards on your board. For example, we label all the “feature” cards on the Trello Development board with the orange label. This makes it easy for anyone who is following our board to filter for all of the orange labeled cards to get a better view of the progress of various features, without all of the noise from other cards.
Well, those are the basics for setting up a public roadmapping board using Trello. Get out there! Get creative! Go public!
And, if you decide to make your roadmapping board public, please share it with us on Twitter @trello