
If you sell products or services and you’re managing your sales leads in a Google Doc or spreadsheet, you’re probably pulling your hair out every day. Documents and spreadsheets are helpful tools, but they’re not the easiest way to visualize the comings and goings of your revenue funnel.
If you’re like me, you’re not quite ready for an advanced tool like Salesforce or HubSpot, but you still need a place to organize all of your sales contacts. At a loss for how to successfully find a middle ground, I decided to give Trello a try and found that it met every need I had for a CRM—without being difficult to set up, or costing me a hefty monthly subscription fee.
It’s quite easy to set up and use Trello to manage your sales leads and customer contacts. Below I’ll show you step by step how to build a CRM, or Customer Relationship Management system, with Trello.
A pro-tip before we dive in: If you want a tool that builds a system like this for you, check out the Crmble Power-Up! Adding Crmble to your board automatically turns your board into a lightweight, yet powerful CRM. Crmble sets up Lists, adds Custom Fields to your cards, creates a dashboard to show your sales pipeline performance, and syncs with Gmail and other marketing sources to automatically important your new leads. Best of all, it’s free for the first 100 cards, so you can try it out for yourself!
1. Start With The Right Layout
When building your board, begin with your layout. It’s best to build your CRM with a list for each stage of your sales pipeline. What does your funnel look like? Does it start with seeking contact, consideration, and then purchase? List out each touchpoint with your potential new customers. Those touch points will each represent a Trello list.
Here’s an example of what mine looks like:
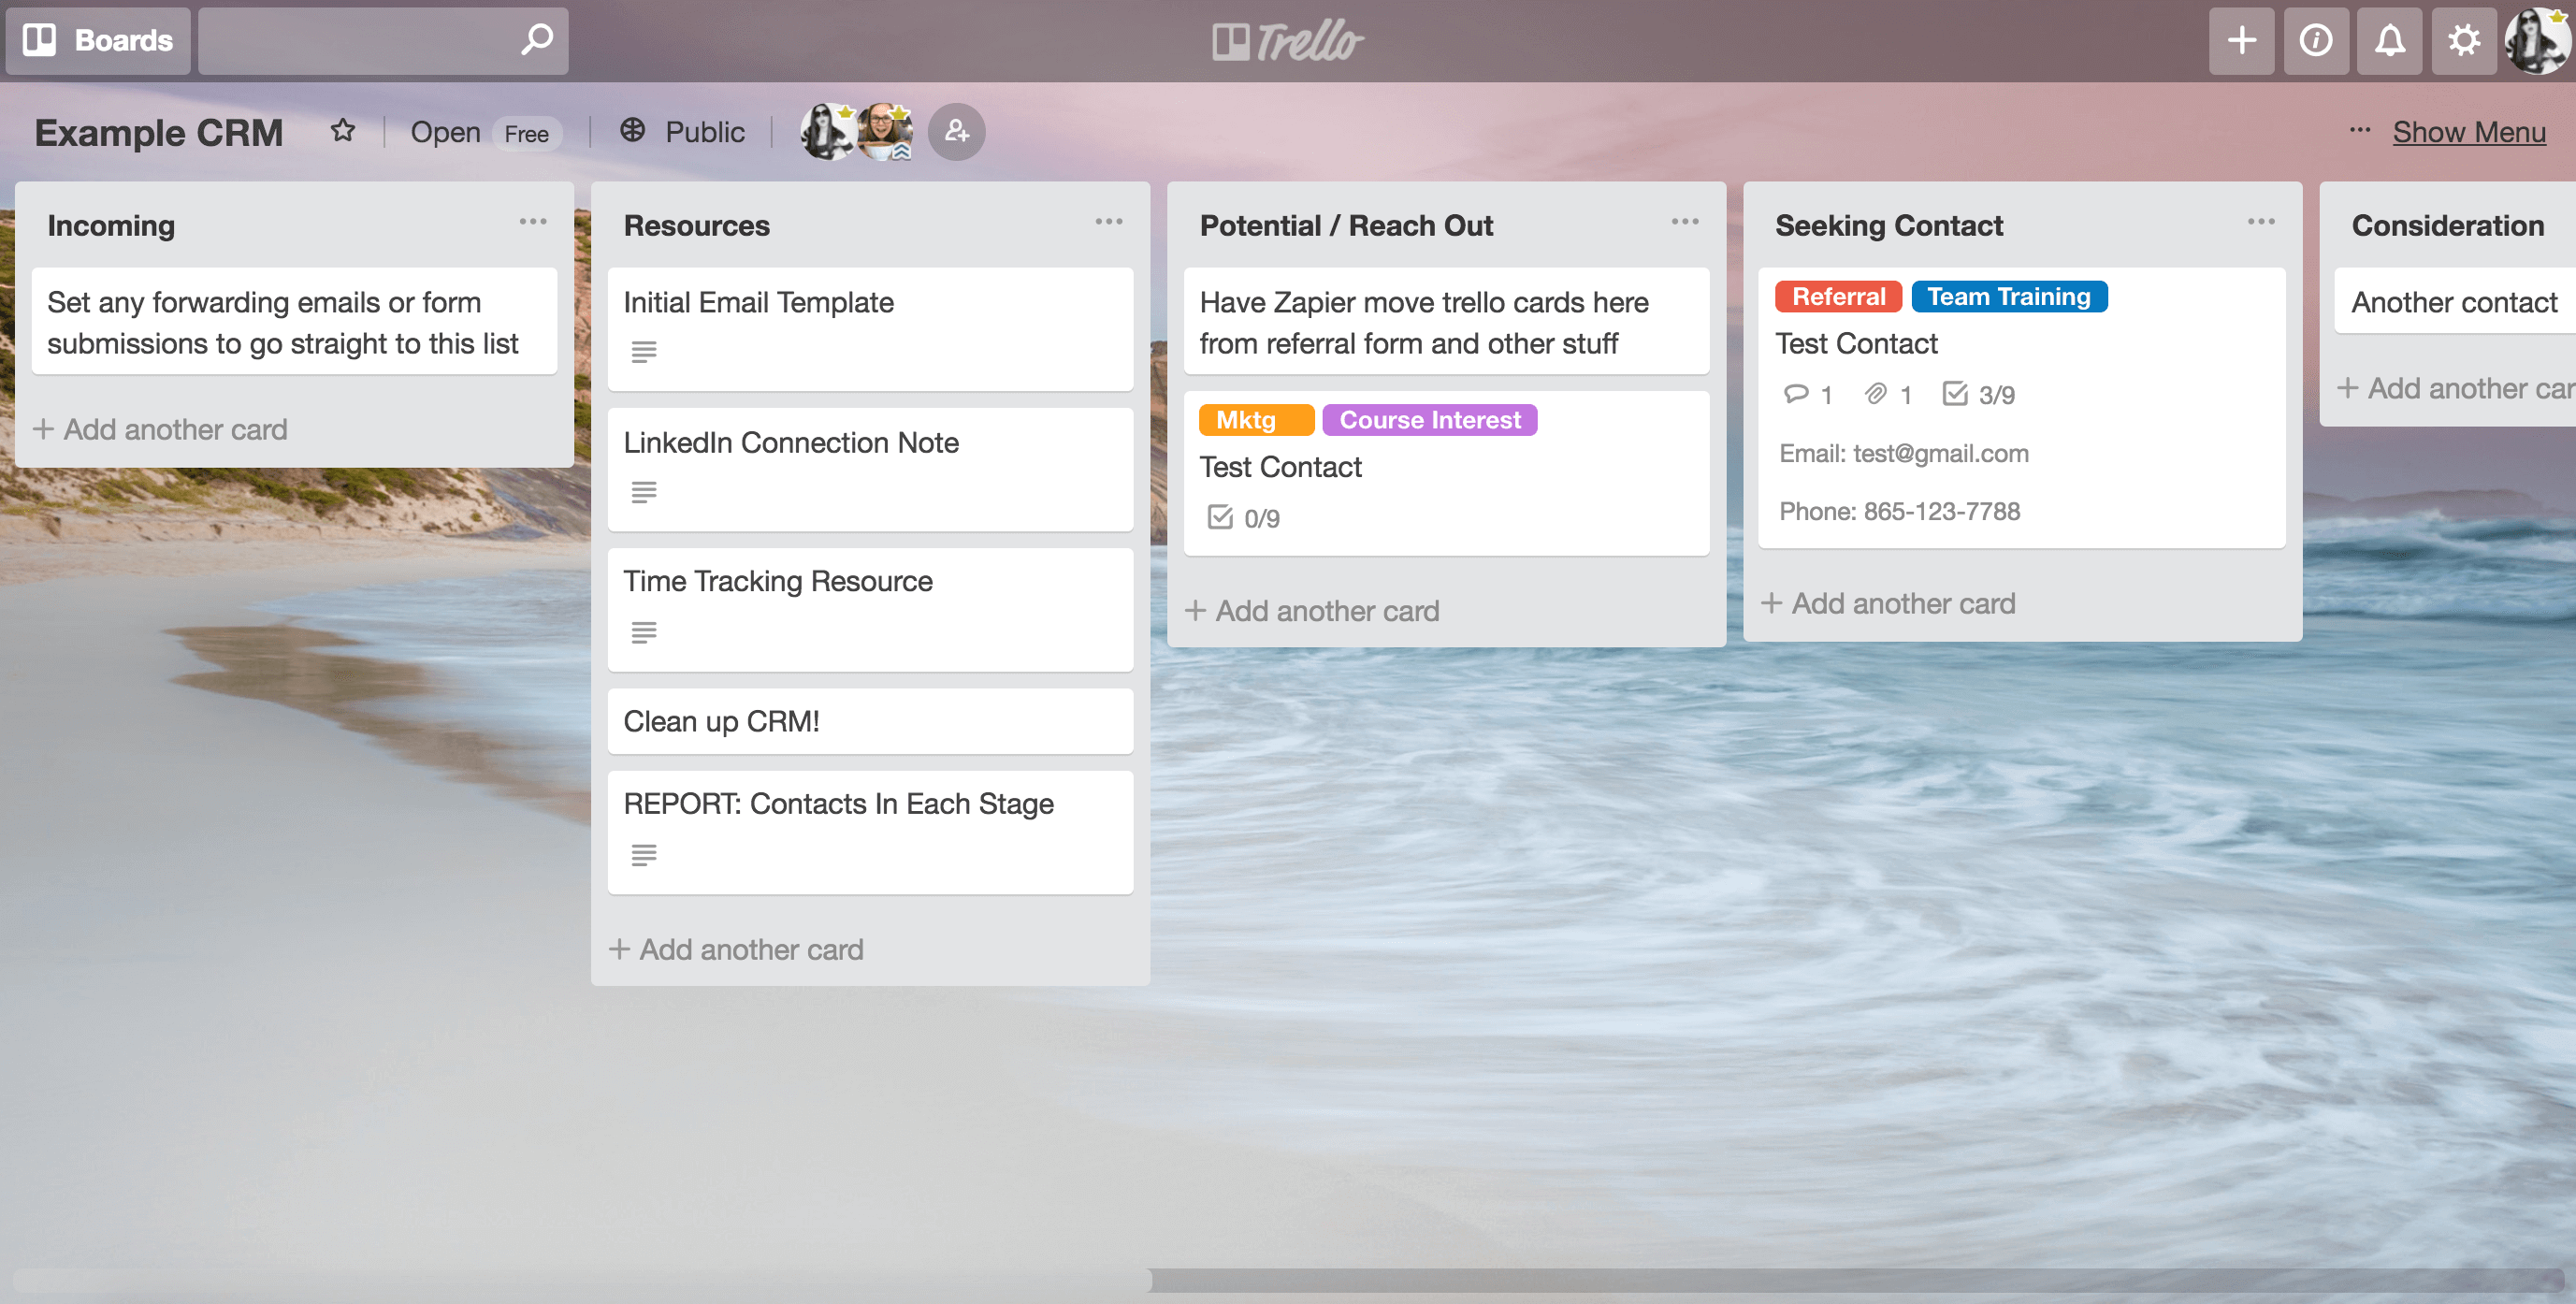
I’ve also added two lists at the end for contacts that didn’t turn into a sale. Those can be “Follow Up Later” or “Lost.”
Having the right flow is critical because if you don’t set up your board correctly, you won’t know where to put your contacts. You might have to play around with a few different ways to organize your board before it makes sense.
As you identify a new stage in your funnel, add it as a list. If you feel like two stages, say “Consideration” and “Decision,” are so similar that there isn’t enough movement in your pipeline, condense them or redefine the stage names. This is the great thing about Trello: You can always create a new workflow step or change one as you go!
2. Add & Organize Your Contacts
Now you can start plugging in your contacts. Each contact is represented as a Trello card. You can store all the information you need in a card, and Trello has a ton of features to make record-keeping easy and organized.
You can manually add contacts of course, but life’s too short to do that all the time.
Where do you get new contacts? TypeForm? Google Forms? Chances are, there’s a way to automatically send incoming leads into Trello. My favorite way is with a tool called Zapier. Effectively what happens is every time someone fills out your form, that information is automatically zapped onto a card in the “Incoming” list of your Trello board, ready for you to move along a workflow.
I use Zapier to take a form submission from a Google Form and create a Trello card with the info. This is incredibly handy since it’s where most of my leads come from! I find that individuals who take the time to fill out the form are the ones who are most interested—they’re basically asking for my services when they fill out that form—so I definitely want to get them in the pipeline quickly!
Even if you don’t use Google Forms, chances are you can use Zapier or a Power-Up to connect it to Trello. JotForm, TypeForm, or just about any other form tool are all supported. This will save you tons of manual work of adding someone in every time you get a lead through a form.
If you get leads over email, you can also use Zapier, or Trello’s native email-to-board feature (more on this later). There is also a Gmail add-on for Trello that will let you send email content directly to your CRM board with the click of a button.
When you add a contact, use labels to help you filter and categorize leads. For example, you might use filters to note where the contact came from, the product or service they’re interested in, or the level of interest.

For added context at a glance, you can use the Custom Fields Power-Up to include relevant information about a lead that you’ll see when looking at the whole board. You can create a Custom Field to show the contact’s email, phone number, expected deal value, or other contact info. You can set Custom Fields to show in the card preview so you can view this info without even clicking into the card.

At the basic level, you could stop right here, and *BAM* you’ve got a CRM.
But if you invest a little more time into your Trello board setup, there are many ways you can make it more powerful, thus saving hours of your time.
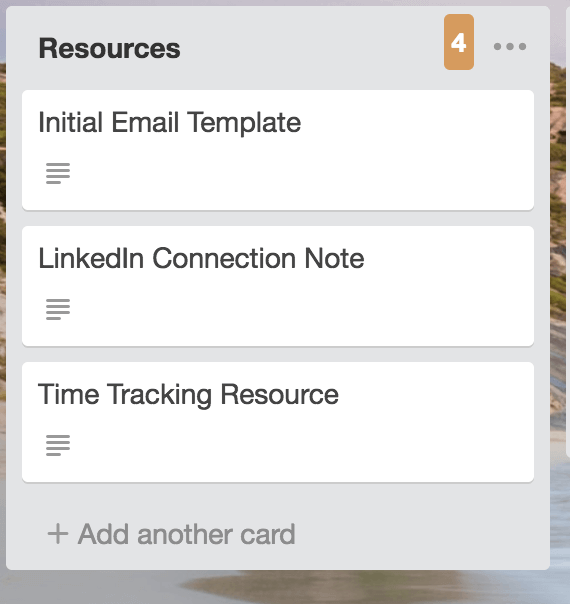
Pro tip: Add a list called “Resources” as the very first list of your CRM board. Use this to store templates for emails, LinkedIn connection notes, decks and presentations, and just about anything else you often reference or materials you frequently send to leads.
3. Nurture Contacts With Your Trello CRM
Following up with leads can be a tedious process, and difficult to keep track of, at that. You want to spend your time talking to people (or even better, working with them!), not documenting everything you do to try to win them over.
Trello makes it easier to nurture contacts. You won’t have to worry about missing communication notes or remembering when to follow up. So much can be automated and organized, and you’ll be able to see it all in one place—your Trello CRM!
Here are some handy features to help you take care of your nurturing process:
Checklists
Meet the checklist: It’s super easy and comes ready to go on every Trello card. If there’s a standard to-do list you go through when following up with leads, just create a checklist on the card. You’ll only have to create it once, and then you’ll be able to copy cards with the checklist, or copy just the checklist to other cards! It’s a great way to keep track of what you’ve already done to nurture a contact, and what’s next.

When looking at the whole board, you’ll see a count of the items checked off each checklist. When you’ve completed all the listed items, the count will go green, which is a great visual indicator that you’ve completed everything in the funnel stage for that lead.
Pro Tip: If you are always using the same checklist over and over again, create a template checklist that is easy to copy over whenever you need it:
Due Dates
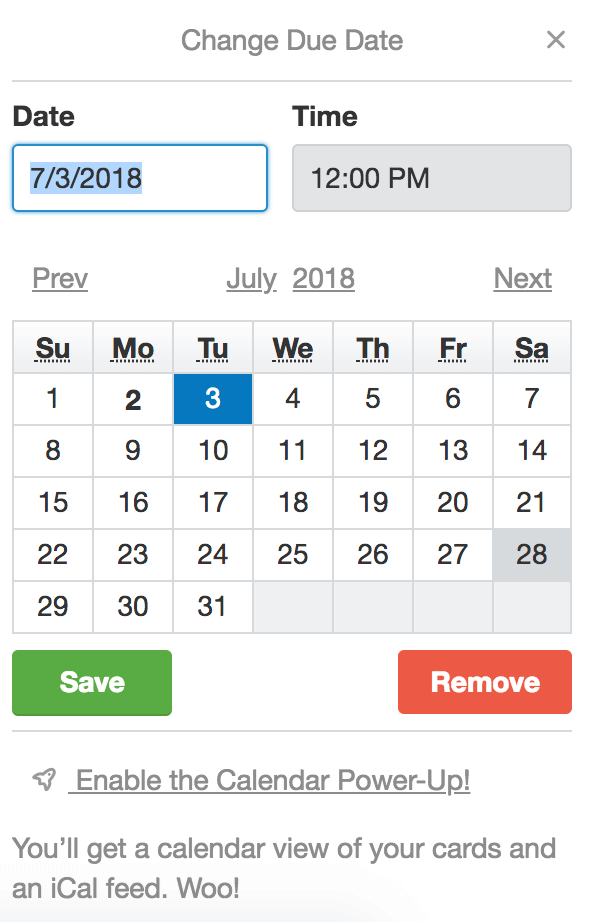
Another feature that’s ready to go as soon as you create a board is Due Dates. Use this to keep track of the next time you need to do something for a contact.
For example, maybe you sent them an email today, and you want to follow up again next week. Rather than put a note on your calendar (or hope you remember), just set the due date and Trello will make sure to remind you. Your reminder notification will bring you right back to the card where you can take action and check something off your checklist (or leave a note).
Once you’ve completed the action, change the due date to your next deadline.
Pro Tip: Enable the Calendar Power-Up and you’ll get a handy Calendar view showing you your pending tasks by week or month. This is a great way to keep an eye on your pipeline flow and make sure you have consistent lead activity week after week. You can also use the Filter feature to only show cards with upcoming due dates.
Comments
Speaking of notes, if you want to attach more information to a contact’s card, you can use the Description box, or you can also use the Comments feature. Comments are helpful for ongoing information because they add a timestamp for when each item is added, such as notes about things happening from time to time like “Leslie opened email,” or “Alex needs me to make a proposal with these details,” etc.

Attachments
Use the card attachments to add ANYTHING you need to your contact. You can store proposals, decks, contracts, or any other relevant documents or pictures. You’ll be able to easily access the attachments from your Trello board on any device. It’s perfect for organizing all of your contact’s documents relating to a sale.
Pro Tip: Enable the Google Drive Power-Up to embed entire folders to your Trello cards, complete with document previews and notes about when they were last edited.
Email to Trello
Don’t feel like copying and pasting emails from your inbox to Trello? There’s no need! You can use Trello’s email-to-board feature a couple different ways:
Each Trello board has a specific email address that creates a new card when it receives an email to that address. So you could organize a list called “Incoming” and forward all your lead communications to that email and then sort the cards out on your Trello board.
That’s a great option and could suit your needs. But there’s a more advanced way to use email-to-board. Did you know that each individual card also has its own email address?
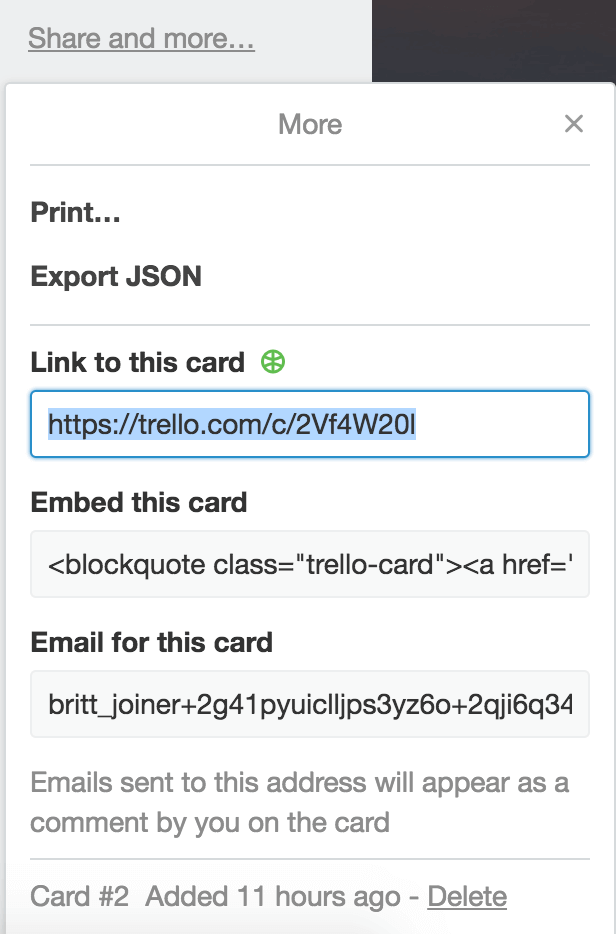
When you get a contact’s email address, create a filter in your email that automatically sends all communication with that contact to the email address for their Trello card.
(If you’re using Gmail, just go to Click Settings → Click Filters → Click Create a New Filter → Define the “from” email as your lead → Click create filter → Click “Forward it”–> (Add a new forwarding address for this Trello card’s address) → and then click Create Filter. Go through the same process again to define the “to” email as your lead’s email, that way you can track emails you send as well as the ones you receive.)

If you don’t love this solution, you can use the Gmail add-on for Trello to connect your emails to a specific card. It’s so easy, you’ll want to turn every email in your inbox into a Trello card.

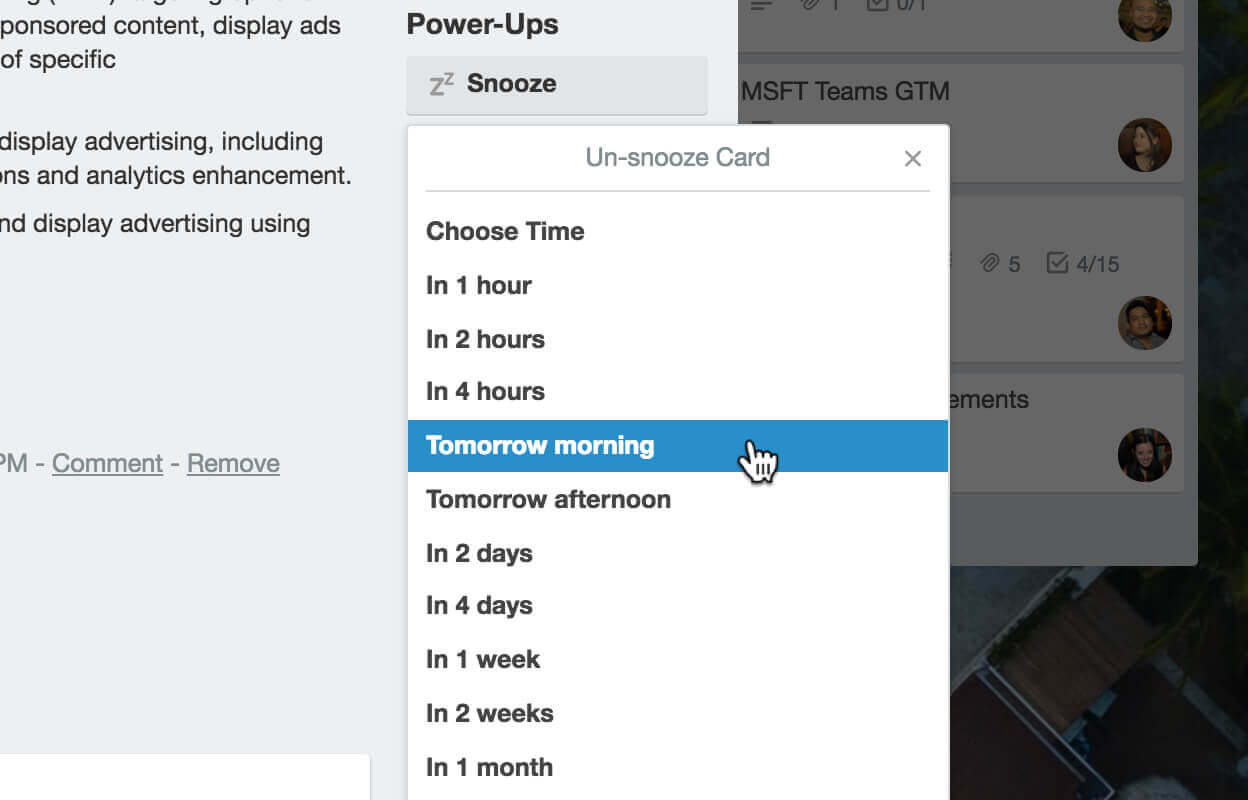
Card Snooze
Got a notification to follow up with a lead, but you’re still waiting on something? No prob—just use the Card Snooze Power-Up and the card (including its due date notifications) will be archived until a specific time that you determine. When that date comes, the card will automatically re-appear in the list you assign.
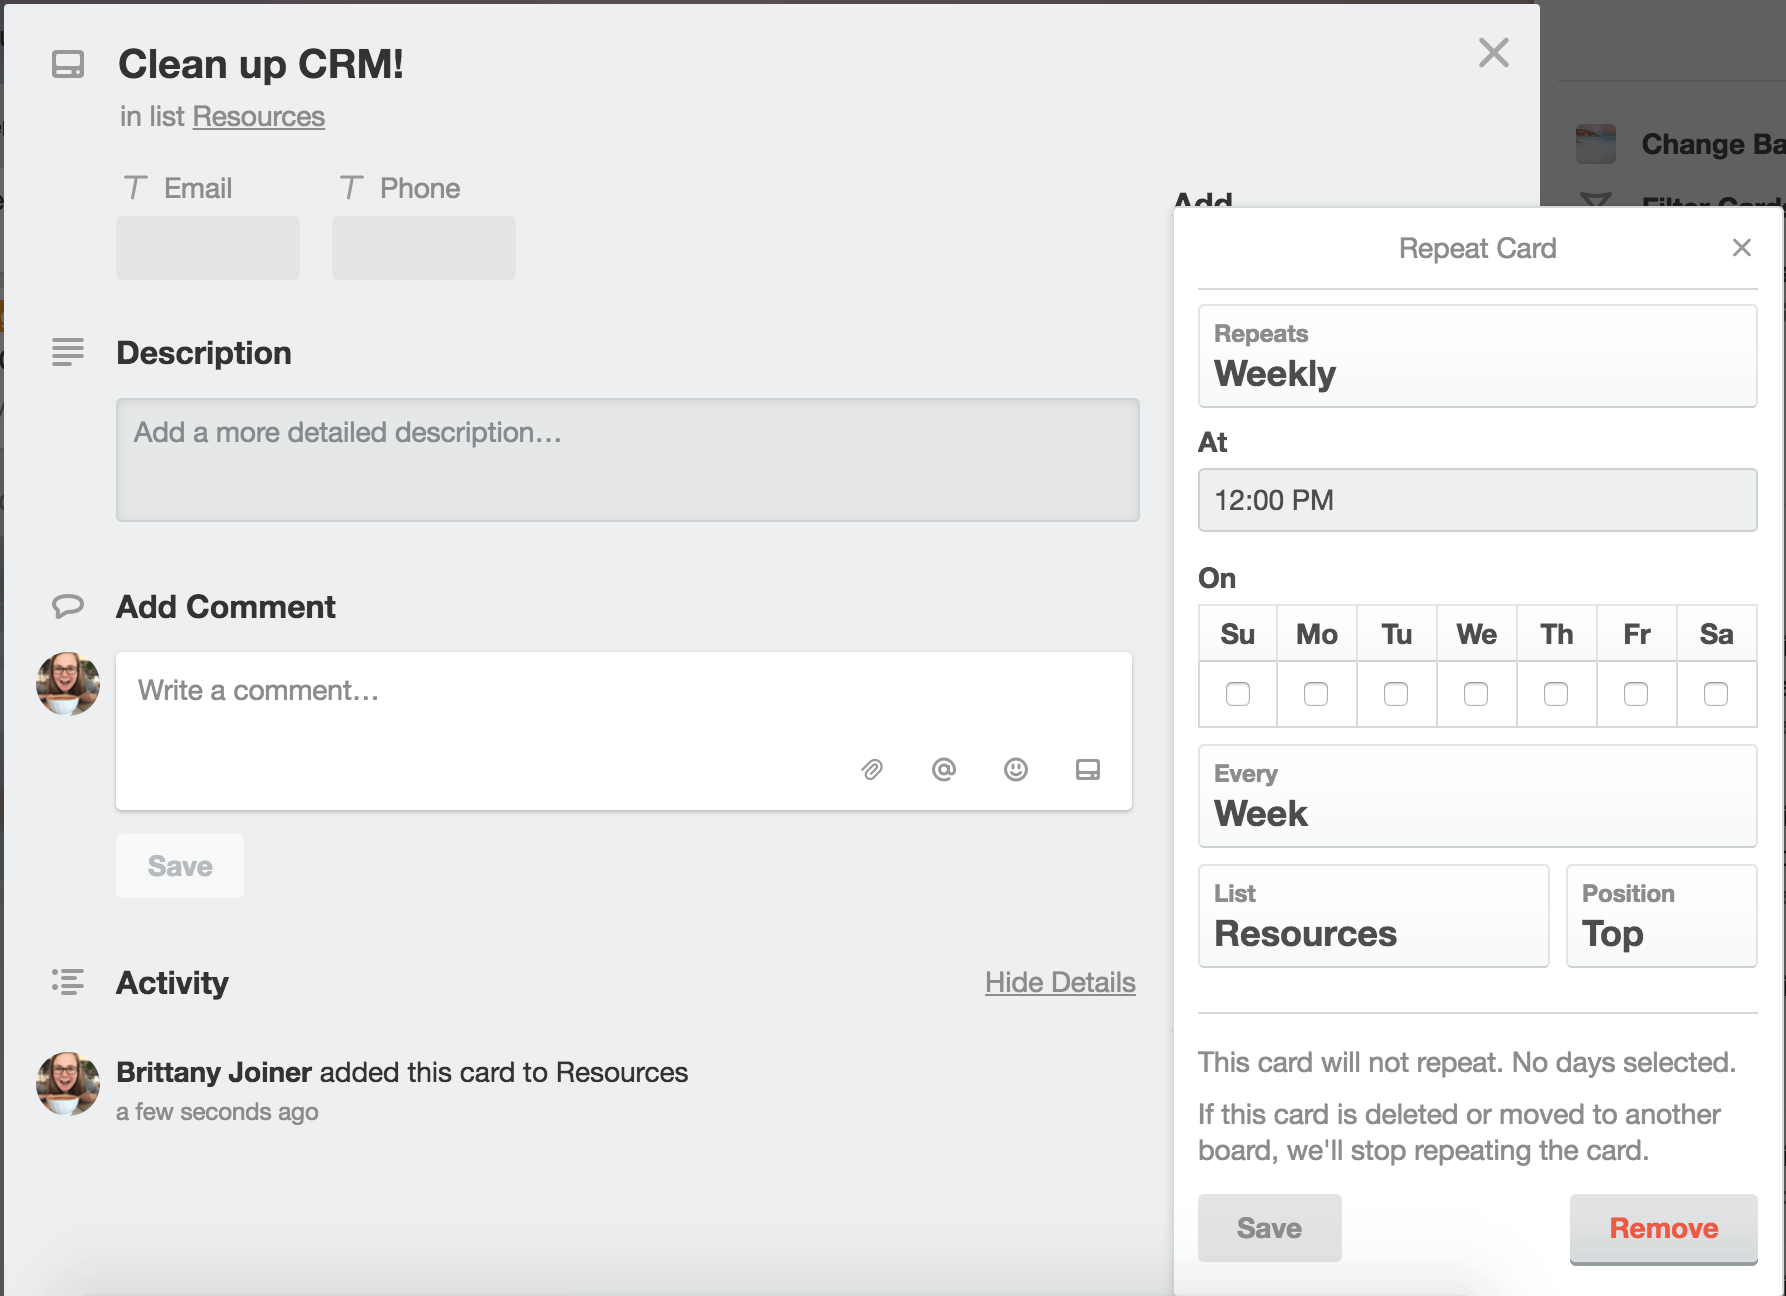
Card Repeater
If you have certain tasks you do each week, there’s no need to manually create a Trello card every Monday morning. You can use the Card Repeater Power-Up to create a card to repeat itself on a recurring day and time of your choosing with all the info (or checklists) you need. Perhaps it’s a monthly reminder to clean up your CRM Trello board!
Package Tracker
If you’re sending tracked mail or packages to your leads and clients, you can use the Package Tracker Power-Up to keep up with packages that you sent so you’ll keep the tracking number handy, and know exactly when they were delivered!
4. Create Reports For Your Trello CRM
So you’ve got your CRM set up and you’re nurturing your contacts, but you need to know how effective your follow-up methods are. Are you moving people throughout your sales funnel?
Although there are no default reporting options within your Trello board, there are several ways that you can get stats and create reports about your contacts and how your CRM (and your sales process) is working.
Count contacts in each stage
Use the Chrome Extension “Original Card Counter for Trello” to count the number of cards in each list. With this, you can easily see how many contacts are in each stage of your funnel.
Integrate time tracking tools
Spend a lot of time nurturing contacts? Integrate time tracking tools, like Harvest or Time Camp, to see how much time you’re spending on each contact. You can use a tracker to compare time spent versus the value of a client. You might find that you spend a lot of time on low value clients, and may want to reconsider your resource management.
With these Power-Ups, you can start the time tracking when you’re inside a Trello card. So when you start your follow-up work, you’ll already be in Trello and can simply start the timer!
![]()
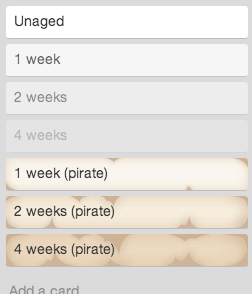
No contact falls through the cracks
Use the Card Aging Power-Up to visually surface leads that are getting stale. This Power-Up will change the way a card looks (either fading it out or
making it look “aged”) if it hasn’t been touched or had any recent activity. You’ll be able to quickly see which leads need to be nudged, and you won’t have to worry about contacts getting lost over time.
Ready To Try It Out Yourself?
Just because many fancy CRM tools out there are specifically made for sales, doesn’t mean they’re the best (or only) options to consider. They’re often expensive and have more features than you need for starting out.
Try using a Trello CRM to see if it suits your needs (and your budget!) while helping you effectively follow up with leads and ultimately get to the important part: Working with your clients. Feel free to copy this CRM template and build your own sales pipeline in Trello.
Good or bad, we’d love to hear your thoughts. Find us on Twitter (@trello) or write in to support@trello.com.
Next: 8 Blips, Tricks, And Stellar Trello Tips To Try This Week