
In a perfect world, everyone recycles their trash and everyone working on a project is collaborating on the same Trello board, including work that involves external clients or colleagues that are either added as Guests or Observers.
Reality, though, is that sometimes due to internal policies or a client’s sheer lack of will when it comes to using a new (even if it’s easy) tool for collaboration has to take place across ancient mediums like stone slabs or email.
Of course, this doesn’t mean that you need to forsake your sacred Trello board to keep that project moving forward.
Here are some handy tips for working with clients or colleagues in Trello even when they’re stuck in email.
Migrate Email Into Trello
When someone makes a request or has an idea that they send via email, the first thing to do is get it out of the inbox and into Trello so that you can organize and prioritize it with the rest of your work.
Trello offers a handful of features, integrations, and Power-Ups to get that done. Here are a few options to consider.
Email-to-board

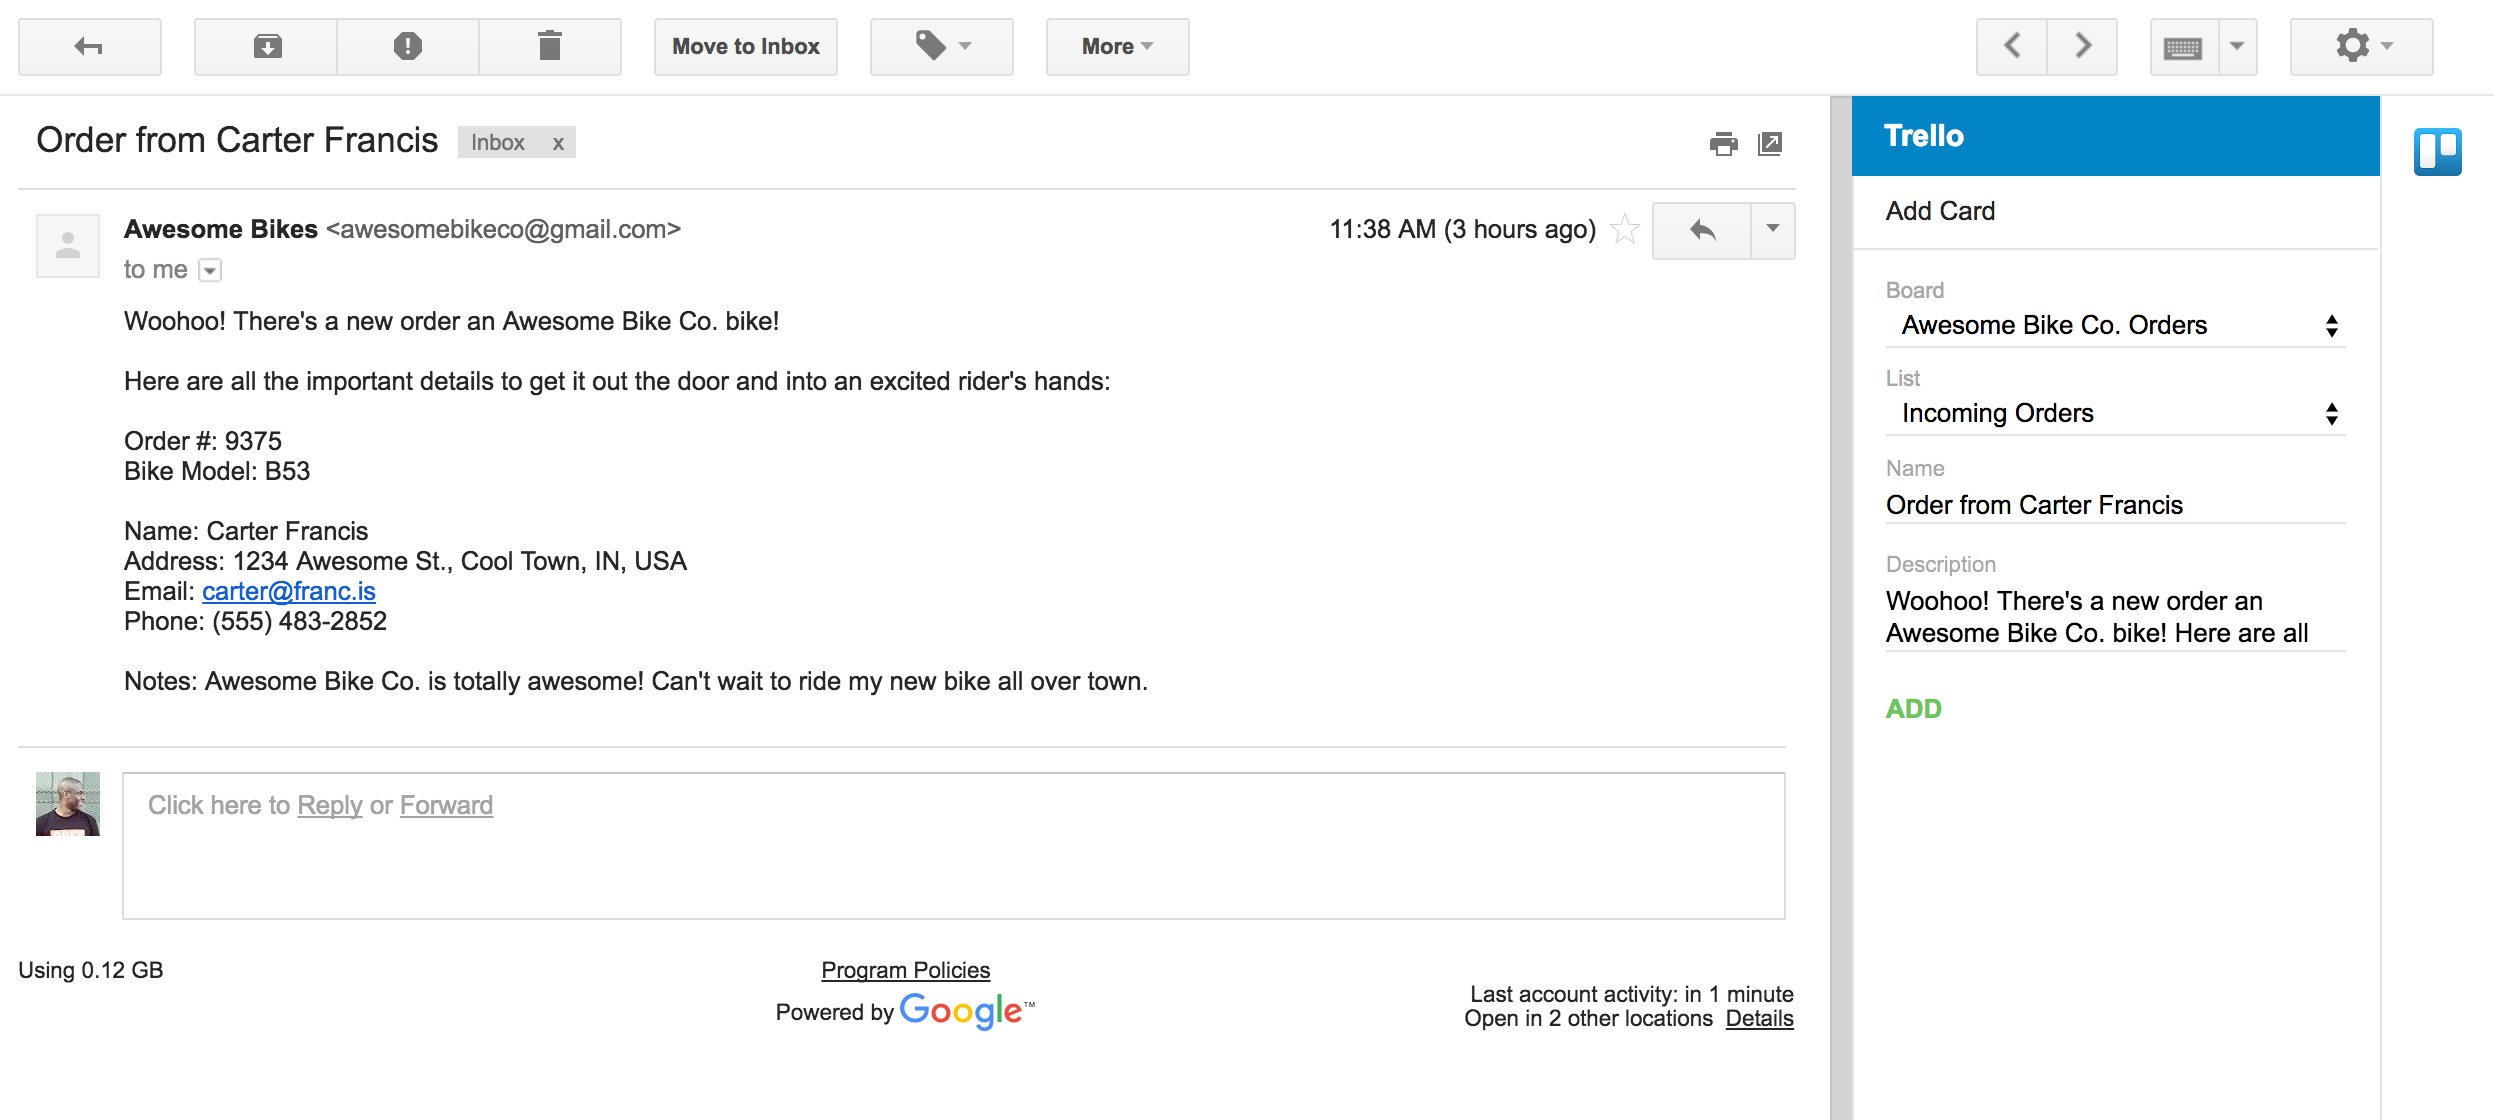
Every single Trello board has a unique email address that allows you to create new Trello cards by sending or forwarding emails to that address. You can even select the list and position you would like those new cards to be created on.
Newly created cards use the email subject line for the card name, the body of the email in the card’s description, and add any attachments to the card.
Here’s how to set it up:
- In a board’s menu click “More..” and then click “Email-to-board Settings”
- Select the list and position for new cards to be created on
- Copy your unique email address and test it out by sending an email to the address
✨Pro Tip: Since each board’s email is a long randomly generated string, consider creating a new contact in your email client with a name that is easier to remember.
When sending emails to a board through the email-to-board address, you can even save yourself some work back in Trello by amending the subject with the following:
- Add labels by putting #labelname, #labelcolor, or #labelnumber in the subject line
- Add members by putting @username in the subject or CCing a Trello member’s email address
Want to see some cool use cases for how others use email to board? Check out this in-depth blog post.
Gmail And Outlook
If you use either Gmail or Outlook then you can take advantage of the Trello integrations with the Trello add-on for Gmail and the Trello add-in for Outlook. Both of these allow you to create new cards anywhere in Trello without leaving your inbox.
You can select which board and list you would like a new card to be created in, edit the name of the card to be created, and the description of the card. Plus, with the Trello add-in for Outlook you can even add a due date to the card being created.
Here are some handy resources to get you up and running:
Gmail
- Add the Trello Add-On for Gmail
- Check out our in-depth blog post about taming your Gmail inbox
- Learn more in our handy dandy help documents
Outlook
- Add the Trello Add-In for Outlook
- Check out our in-depth blog post unraveling the facts about Inbox Zero
- Learn more in our (still handy dandy) help documents
SendBoard Power-Up

The SendBoard Power-Up is a really neat Power-Up. Not only can you create new cards from emails, but you can also reply to those lingering emails and manage communication all from within Trello. It really brings your inbox into Trello so that your team never needs to jump between apps to manage the work getting done.
Similar to the Email-to-board feature, but by associating an existing team email address with a board (e.g. sales@company.com), new cards will be created for each incoming email on a designated list. The power behind this Power-Up is that your team can collaborate on a response and then respond to that email directly from the Trello card with a rich-text experience and even include attachments.
Bring Feedback Back Into Trello
Perhaps you sent a client an email with some work to be reviewed and they have feedback. It’s easy to send this input directly to a Trello card as a comment, because just how every Trello board has a unique email address, so does every single Trello card.
Every. Single. Trello. Card!
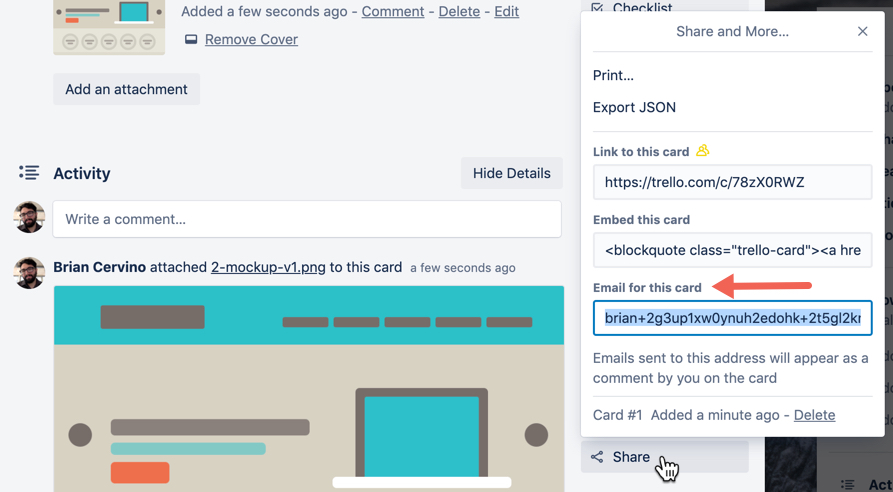
To access a card’s email address on the web, click a card to open it, click “Share” in the Actions section of the card back, and copy the card’s email address. Emails sent from that address will show up on the card as a comment from you.
Automated Update Emails With Butler
Finally, save time and clicks by automating the process with Butler. Business Class and Enterprise teams have advanced Butler features including the ability to send emails as actions for Buttons, Rules, and Calendar and Due Date Commands.
This means that as projects move forward, you can keep clients in the loop automatically.
For example, a Rule could be built so whenever a card is moved into a list name “Awaiting Client Feedback” an email could be sent that includes both pre-populated text and information pulled in through the use of variables in Butler.
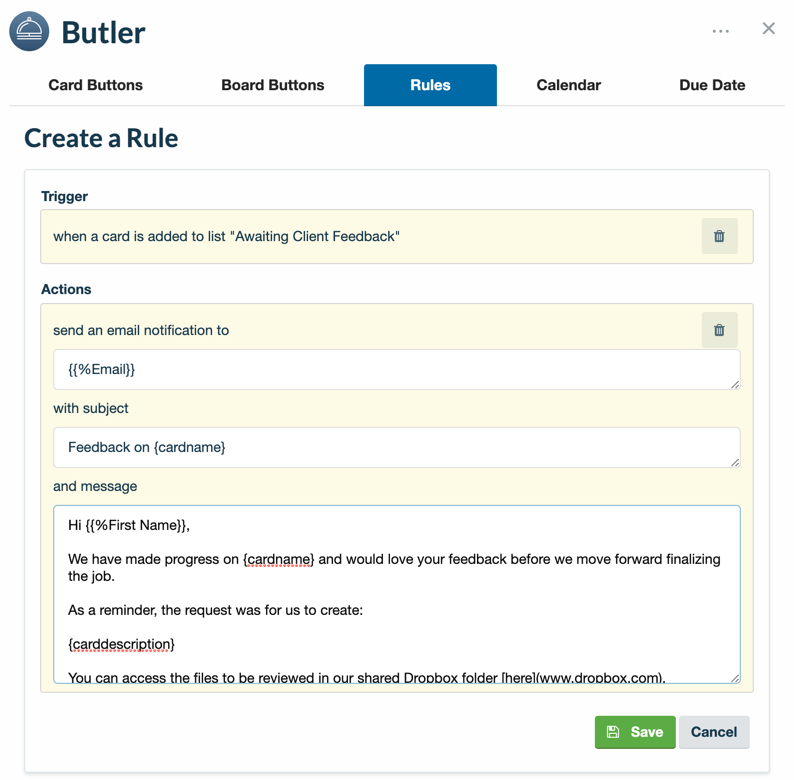
In this use case, I am sending an email to my client that includes the following information:
- Email address: {{%Email}}
- Subject: Feedback on {cardname}
- Body text: Hi {{%First Name}},We have made progress on {cardname} and would love your feedback before we move forward finalizing the job.
As a reminder, the request was for us to create:
{carddescription}
You can access the files to be reviewed in our shared Dropbox folder [here](www.dropbox.com).
Providing feedback by {cardduedate} will help keep everything on track for the agreed upon delivery date.
Thanks,
Brian
As you can see, I’ve incorporated variables into the email’s subject, and body fields to save time, since Butler can automatically pull this information in for me. Here’s a breakdown of what each variable does:
- {{%Email}} – Custom Field variable for the “Email” Custom Field
- {cardname} – Name of the card
- {{%First Name}} – Custom Field variable for the “First Name” Custom Field
- {carddescription} – Card description text
- [here](www.dropbox.com) – Markdown link to Dropbox shared folder
- {cardduedate} – Due date on the card
To build your own email send Butler Rule follow these steps:
- Enable the Butler Power-Up on your board if you haven’t already
- In Butler’s menu, select “Rules”
- Click “Add Rule”
- For the trigger, select “when a card is ‘moved into’ list ‘Awaiting Client Feedback’” and then click the + sign to add the trigger.
- For the action, click the chat icon tab to locate the email send field
- Input the email address, subject, and body of the email you’d like to automatically send and then click the + sign add it to the Rule.
- Click “Save” to save the Rule and you are ready to go!
Bridge The Communication Gap With Trello
As you can see, Trello offers a slew of ways to seamlessly incorporate email into your workflow.
Whether it’s working with clients, maintaining sales leads, or collaborating on customer feedback, you can get your work done in Trello without skipping a beat or important update buried in an email thread.
Good or bad, we’d love to hear your thoughts. Find us on Twitter (@trello) or write in to support@trello.com